Tinc switched on Debian 9 "stretch" (and old configs of debian 7)
Install Tinc: #
apt-get install tincConfiguration: #
the tinc configuration is based on some files:
- /etc/tinc/
- nets.boot this file contains the vpns that will be activated on boot (automatic creation)
- vpn0/ this folder is a vpn and contains all the correlated files (manual creation)
- rsa_key.priv this file is the private key of the local tinc host (automatic creation)
- tinc.conf this file is the configuration of the vpn (manual creation)
- tinc-up this file defines the behaviour of the interface on start (manual creation)
- tinc-down this file defines the behaviour of the interface on stop (manual creation)
- hosts/ this folder contains the public keys of the servers participating the vpn (manual creation)
- host01 this file is the public key of local host host01 (automatic creation)
- host02 this file is the public key of remote host host02 (manual transfer from host02)
- host03 like host02
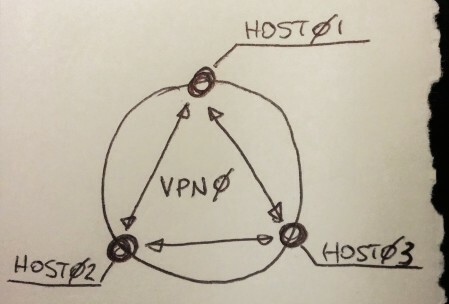
to configure a tinc vpn in which all the hosts are “on the same switch” edit these files on the hosts
- mkdir /etc/tinc/vpn0 #create the vpn main directory
- cd /etc/tinc/vpn0 #
- mkdir hosts #create the public key folder
- touch tinc.conf tinc-up tinc-down #touch the files that will be edited later
- chmod +x tinc-up tinc-down #make the interface files executable
then edit:
tinc.conf:
Name = host01                                      #name of the host, this must be the same as in the folder hosts
AddressFamily = ipv4                          #I live in the past, ipv4 is ok for me
Mode = switch                                      #the mode of the vpn, I choose switch
Device = /dev/net/tun                           #the device, I found that that parameter is ok like that (otherwise it won’t work)
ConnectTo = host01                             #the hosts to connect to on start (or every 15min as I read from the docs)
ConnectTo = host03                             #as above
tinc-up:
#!/bin/sh
ifconfig $INTERFACE 192.168.0.1 netmask 255.255.255.0                     #change 192.168.0.1 as the ip of the interface of the host (gor host01 I set 192.168.0.1, for host02 192.168.0.2)
tinc-down:
#!/bin/sh
ifconfig $INTERFACE down
and give these last files execution permissions:
chmod +x tinc-*then you can execute the creation of the keys with the command:
tincd -n vpn0 -K4096which will create the private (/etc/tinc/vpn0/rsa_key.priv) and public key (/etc/tinc/vpn0/rsa_key.pub) for the local host,
this step must be executed on all hosts.
then you have to add your hosts file for your own machine using the content of the public key:
in /etc/tinc/vpn0/hosts/yourmachinename
Address=98.263.34.11 655                          #the public ip address or FQDN (this changes for every host, obviously)
Port=655                                          #the port to connect
Compression=0                                     #the compression (I have not used it)
Subnet=192.168.0.1/32                             #your host's ip on tinc network

—–BEGIN RSA PUBLIC KEY—–
##########################################
—–END RSA PUBLIC KEY—–
then you have to copy this host file in the folder /etc/tinc/vpn0/hosts/ of the other hosts,
and viceversa, you have to copy the other hosts you want to connect to to your machines' folder.
Logging: #
edit the systemd unit file:
nano /lib/systemd/system/tinc@.serviceand add "--logfile" ad the end of the Exec commands:
ExecStart=/usr/sbin/tincd -n %i -D --logfile
ExecReload=/usr/sbin/tincd -n %i -kHUP --logfile
Autostart: #
you can start your service using:
systemctl enable tinc@vpnto start or restart:
systemctl start/restart tinc@vpnLOGGING & DEBUGGING: #
if you start tinc with --logfile as above it will automatically create a file /var/log/tinc.vpn0.log
you can use the killsignals to output some useful stats on your logifle.
to do everything in one line I use:
vpn0_pid=$(cat /var/run/tinc.vpn0.pid) && kill -s USR1 $vpn0_pid && cat /var/log/tinc.vpn0.log
IPTABLES: #
you have to allow the port 655 in tcp and udp, if yout default is to dropeverything in INPUT, you have to allow the network in input:
-A INPUT -d PUBLIC_IP -i INTERFACE -p udp -m udp –dport 655 -j ACCEPT
-A INPUT -d PUBLIC_IP -i INTERFACE -p tcp -m tcp –dport 655 -j ACCEPT
-A INPUT -i vpn0 -j ACCEPT
!!! this part is only valid for debian 7: #
then you can start the vpn with

tincd -n vpn0 –logfile

and kill it with:

tincd -n vpn0 -k

to start automatically on boot the vpn add the vpn name in the file

/etc/tinc/nets.boot

if you append –logfile -d at your entry in nets.boot which might become something like:

vpn –logfile -d

you’ll find a neat /var/log/tinc.vpn.log logfile (won’t work in Debian9, see below)
main sources:
http://stacksetup.com/VPN/UsingTinc
https://silvenga.com/deploy-a-tinc-mesh-vpn-running-tap/
other sourced:
https://www.digitalocean.com/community/tutorials/how-to-install-tinc-and-set-up-a-basic-vpn-on-ubuntu-14-04
https://wiki.archlinux.org/index.php/Tinc